Hunchback Exercises
Body Part:
Back
Required Tools:
Foam Roller, Massage Ball
Level:
Beginner
Body Part:
Back
Required Tools:
Foam Roller, Massage Ball
Level:
Beginner
A rounded back posture, more commonly known as “hunchback,” (kyphosis) is a widespread problem and one of the most common posture-related issues. Generally speaking, this arises from poor postural habits, and any noticeable “hump” can be trained away with some simple exercises.

Sign up for our free newsletter and discover how to manage your pain yourself. Every two weeks, we’ll deliver follow-along videos and articles to your inbox.
Almost everyone understands what is meant by a humped or rounded back: sitting at a desk for long periods of time, for example, means you can develop a posture that is tilted forward. As a result, your chest muscles “shorten” (because of this tilted position), your shoulders are pulled forward, and your chin is hyper-extended. In other words, a rounded back is caused by poor posture. While your thoracic spine does have a natural curve, any forward curvature beyond 40 degrees is described as a rounded back.
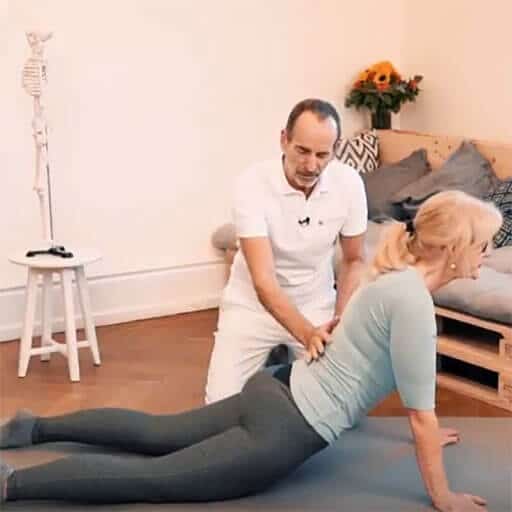
Get down on all fours for the starting position. Your knees should be slightly apart and your palms pointing slightly outwards. Now slowly let your groin sink further and further downwards. Gradually let your stomach drop more and more, which will take your head upwards.
Hold this position for two minutes. You will certainly feel this exercise, especially in your lower back. That’s okay, but make sure you don’t take it as far as level ten on your pain threshold. You would have to brace yourself to withstand the pain at that intensity – so stay at level seven.
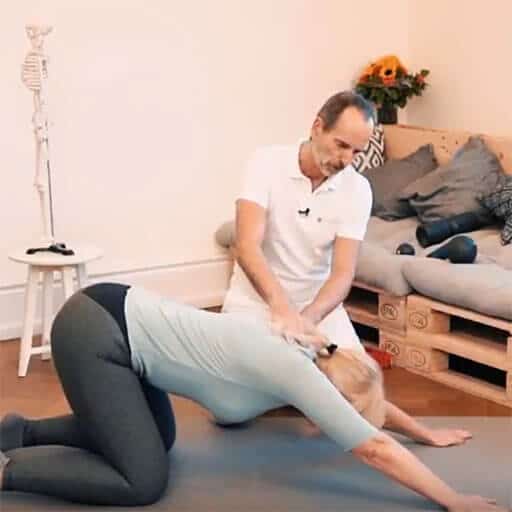
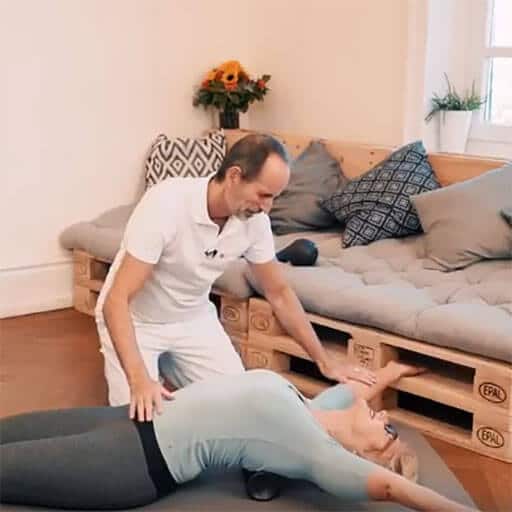
Get yourself back into the all-fours position again, and be sure to keep your hands and feet in the same starting position. Now lower your breastbone further and further and stay in the stretch for a minute. With this exercise, you will be loosening up all those frontward fascial pulls. After a minute, pull your arms closer together in front so that your splayed thumbs are touching, and from this position, try to go as deep as possible into the stretch.
Make sure your thighs remain vertical or angled slightly backward, but never forwards. Remain in this position for two minutes. In the third phase of this exercise, move your hands outwards at an angle of about 60 degrees. Lower your breastbone once again, and stretch. In each of these phases, you will feel the stretching in different parts of your back. This will continue to loosen your overloaded muscles and fasciae.
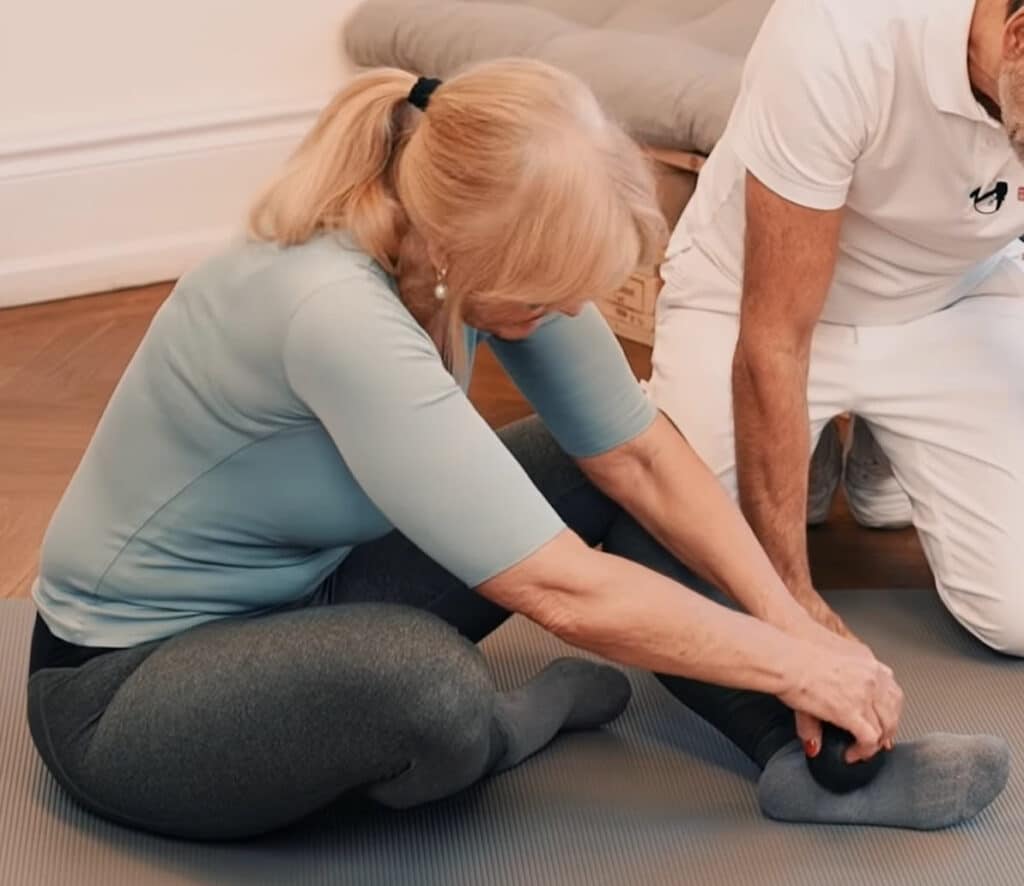
You need: our mini foam roller OR something similar in shape
Lie down and place the midi foam roller at the point on your back where you feel the greatest stretch. Slowly tilt your head back, and slowly take your arms straight back too. Experiment with the foam roller’s placement until you find the optimum spot that allows the most significant stretch. Hold that position for two minutes, or maybe a little longer.

To finish, make a conscious effort to stand upright, with a perfectly straight back and no hollow. Take time to recognize how that makes your body feel and notice the changes and improvements you have achieved with these stretches.
If you repeat these exercises regularly, you can prevent or even reverse the progression of your rounded back. Incidentally, the common view that a rounded back means you need to significantly strengthen your upper back muscles to compensate is just not accurate. If the fascial tensions in the frontal region are not relaxed, the muscles in your back will be unable to compensate for this, no matter how much training they receive.
RELATED POST: EVERYTHING ABOUT BACK PAIN
Sign up for our free newsletter and discover how to manage your pain yourself. Every two weeks, we’ll deliver follow-along videos and articles to your inbox.
Then we would be happy if you shared it with your friends: