


The Best Foam Roller Exercise for Back Pain
For people who spend long days at their computers or constantly carry around heavy objects, back pain is often a frequent visitor. Luckily, they don’t have to endure the discomfort! With our Liebscher & Bracht pain therapy, relief can be achieved. In this article, we’ll share an excellent foam rolling massage routine for a healthy and pain-free back. If you do these steps regularly, you will be pleasantly surprised to find that your back will be much stronger and less susceptible to pain. Learn more below!
To complete these foam roller exercises for back pain successfully, you will ideally need our set of foam roller massage tools. Alternatively, of course, you could use a different roller massage ball. But to get good results, please ensure such alternatives are as similar to ours as possible.
Fight Pain with Information.

Subscribe to The Pain Relief Advisor
Sign up for our free newsletter and discover how to manage your pain yourself. Every two weeks, we’ll deliver follow-along videos and articles to your inbox.
Foam Rolling Massage for Back Pain
Step 1: Foam Roller Exercise for Your Lower Body
Just a word about this first exercise: We begin at the front of your body because a foreshortening of your front muscles is common where there is back pain. It indicates things are not quite as they should be. So addressing your front musculature is actually an important part of the solution.
This exercise starts using the mini massage ball.
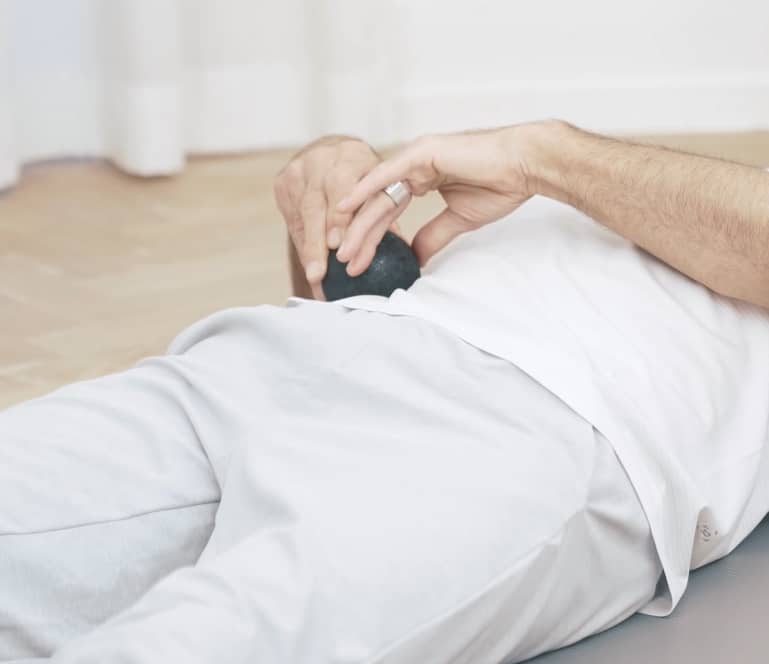
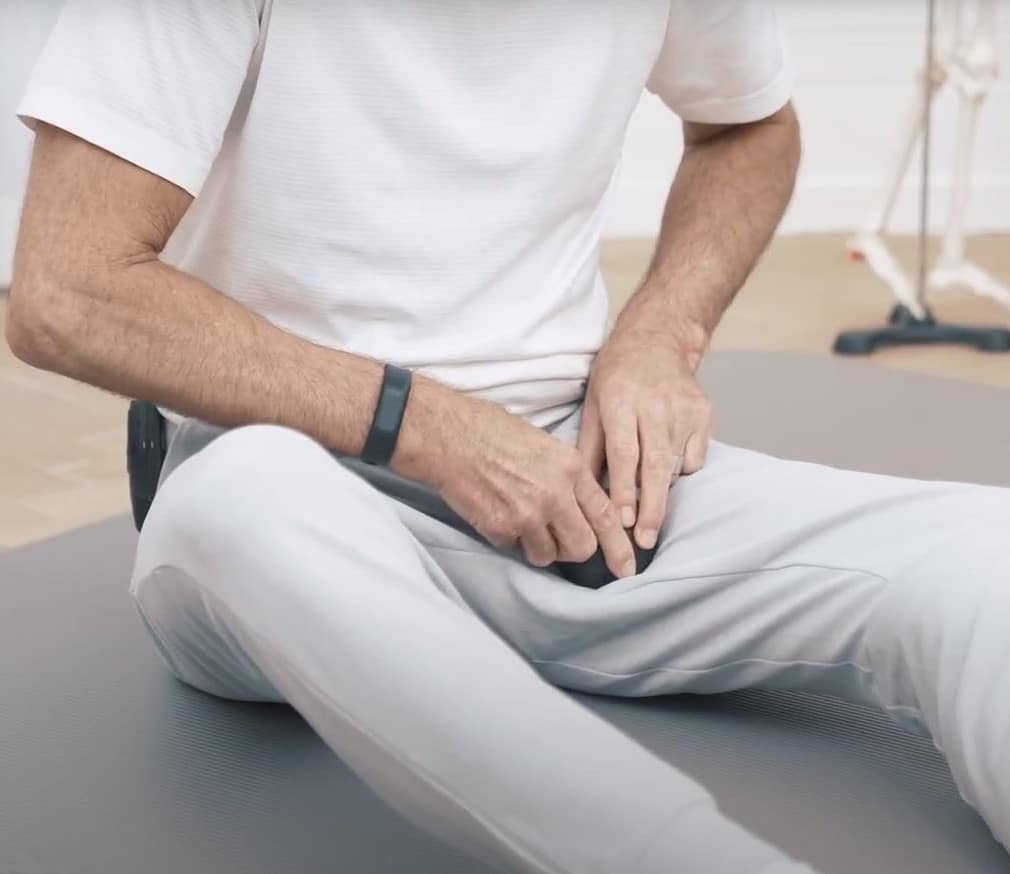
Find a comfortable place where you can lie down flat on your back. Then, with the mini massage ball held in your dominant hand, use your other hand to locate your pubic bone. Once you have found this bone, just down below the navel, you will need to find its left-hand end. This is the spot where you place the mini-ball.
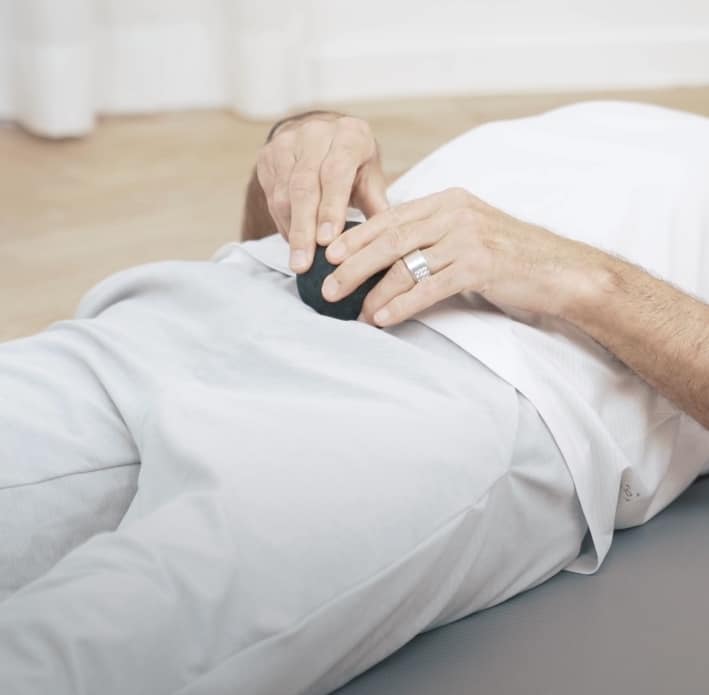
To apply pressure here, aim to work from an area 45 degrees in front – above, and against the edge of that pubic bone. Use an intense rolling motion which works on the edge of the bone by moving in tight, tiny spirals all along the edge of the bone. You may find some areas are more sensitive than others, and these should be given a little extra attention. Apply enough pressure while foam rolling, but remember: stay between 8 and 10 on your personal pain scale.
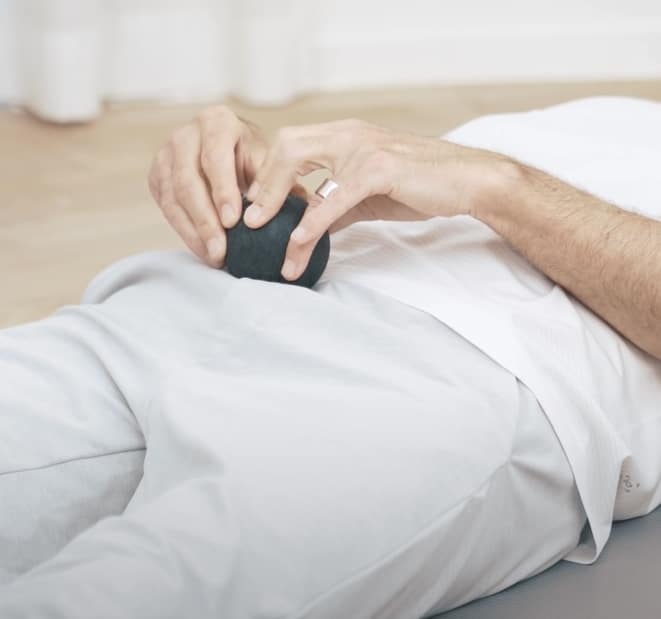
Traveling along the edge of your pubic bone, you will soon reach the far end. So then start once more at the left end, but this time try to work the mini ball a little deeper, pressing a little harder into the abdominal wall. This will tend to flatten the angle at which you apply pressure.
Once again, be aware of any areas which are more sensitive and ensure they get a little more treatment accordingly. On reaching the end of the pubic bone, you should return to the beginning once more.
Starting again from the left – for the third time – you should again alter your angle of approach. Now your massage movements should focus just a little more on the front edge, and also a little more from above. As you do this, try to again notice where the sensitive areas seem to be. They may have shifted once again, but will still need more attention than the surrounding areas. Keep this massage movement going all the way across until you reach the right-hand corner of the bone for the last time. This exercise should take you around 1,5 to 3,5 minutes.
Step 2: Moving to Your Hips and Beyond
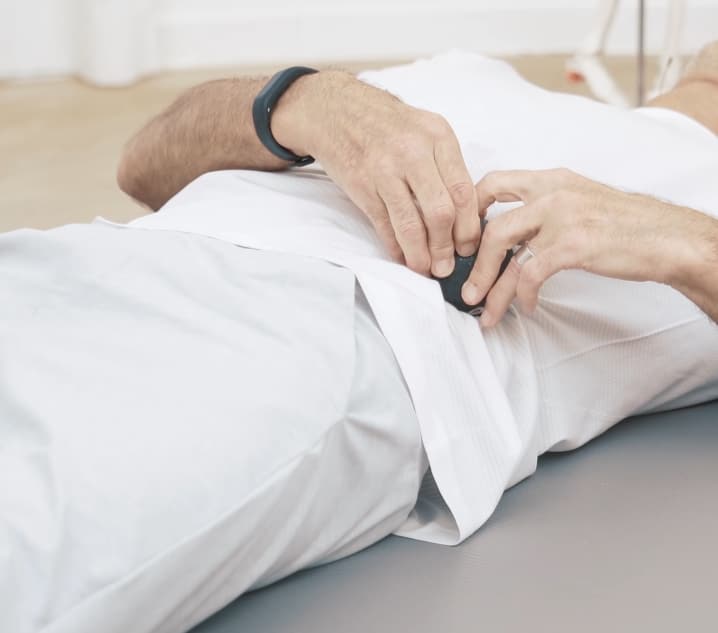
Now use the index finger of your right hand to find your protruding “hip spike” (also known as the anterior superior iliac spine, or ASIS for short). Place the mini massage ball against this hard bone which lies, on the right-hand side, at the very top end of your pelvis. Then roll the mini-ball, with small spiral movements, down a little towards the groin area.
You should seek out an area about two centimeters square which is noticeably more sensitive. Here, spiral across the point you feel to be the most sensitive, increasing the pressure as you do so, but always staying below ten on your personal pain scale. As you roll over this area again and again, that sensitivity will decrease more and more.
Now move the mini-ball back up to the “hip spike”, and roll it slowly and intensely along its inner edge. Moving higher up this bone, find the upper edge (the iliac crest) and roll all along it until you reach the right side of your body.
Once you reach the right side, roll the mini massage ball on upwards. Within a few centimeters, you will reach the bottom edge of your rib cage, an area known as the right costal arch. Just feel with your left hand again to make sure you have found the spot.
Once there, move the ball along the lower edge of the right costal arch. Your rolling movements should be tiny, but very intense spirals of no more than around 2-3 millimeters in diameter. So as you circle tightly around, slowly moving forward along the lower edge of your rib cage, you will gradually get closer and closer to your breastbone (sternum).
You will now reach a small point of bony cartilage at the lower end of the breastbone, known as the xiphoid process. And you are sure to notice how this area becomes ultra-sensitive to your mini-ball foam roller massage. At this point, it’s best to start rolling with both hands, but still moving intensely around the edge of this small bone.
In this highly sensitive xiphoid-process area, you should seek out the area of greatest sensitivity. Then give this spot the most attention, but remember to stay within your own comfortable pain threshold. During this action, be sure to use all the flexibility of the mini-ball surface to get right into every depression along the way.
Rolling will now take you over on to the lower edge of the left rib cage (costal arch). Try to keep rolling very slowly along this edge too. Focus most on the ‘leading’ edge as you move along – always bearing in mind your pain threshold – because this is likely to trigger a more intense pain. Soon you will reach the ‘lower left corner’ where the front of your left ribcage ends.
Now the movement continues by rolling on down to the top edge of the iliac bone towards the left “hip spike”. Keep the intense pressure on (remembering your pain threshold), now controlling the movement with your left hand. After rolling around this hip spike in the same manner as before, your foam rolling massage should turn inward towards the groin. As before, you are seeking a sensitive area 2-3 cm below the hip spike itself. This extra-sensitive spot is again around two centimeters square, and again needs plenty of massage attention.
Step 3: Torso
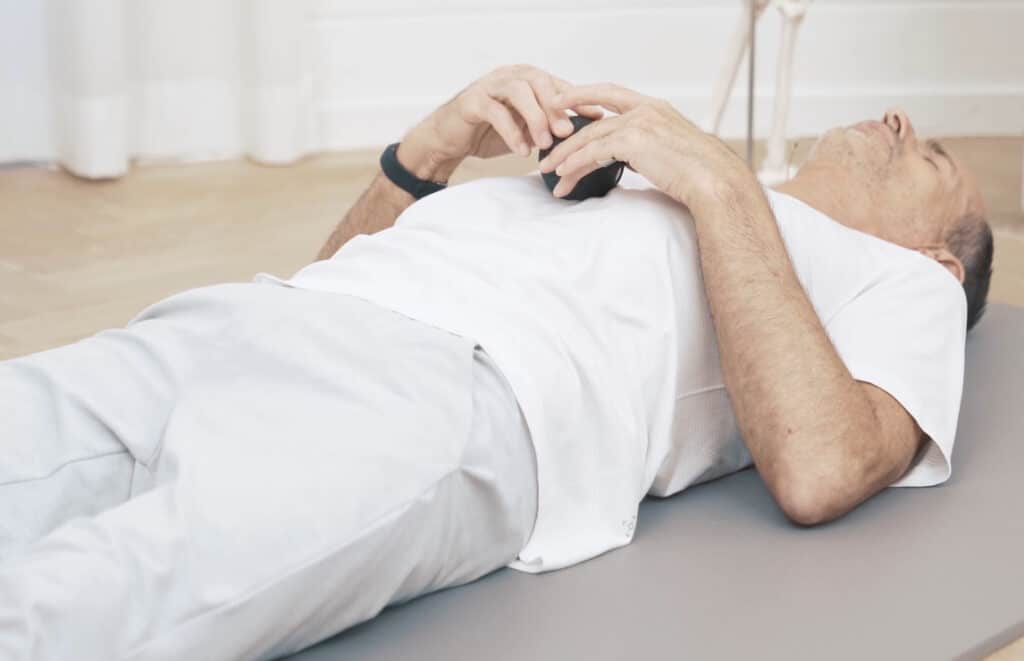
For this next part of the foam roller exercise, we now need to change the location of the massage ball. So reach out and find your breastbone (sternum) and in particular the xiphoid process bone at its lower end.
Start by rolling slowly up the left-hand edge of the xiphoid process bone. This should again be small, intense spiral movements, which travel slowly along the edge of the bone. Then continue these tiny rolling movements upwards and along the edge of your sternum, heading on in the direction of your neck.
And once again, if you notice any particularly sensitive areas, roll a little more intensively as you dwell for a moment on that spot – but keep the massage ball moving. As you slowly approach the top of the sternum, ladies should be careful not to roll the ball over the chest, but carefully stay in contact with the right edge of the sternum.
Having reached the top of the sternum, you should stay away from the throat/larynx and simply roll the ball across to the right-hand side. At this stage, it’s wise to stop and feel again to locate where the sternum is. Now you should begin to move down the right-hand edge of the sternum. The small, circular movements should be the same, working that edge intensely as you slowly move down towards your stomach region.
You will, of course, be aware that these foam roller exercises for back pain also put a considerable strain on your arms and hands. What you will find is that, as you repeat these rolling exercise routines, you will gradually gain more strength and control through continued practice.
As you slowly reach the lower end of your sternum once more, it’s now time to put the ball down for a moment and slowly come up out of that lying down position.
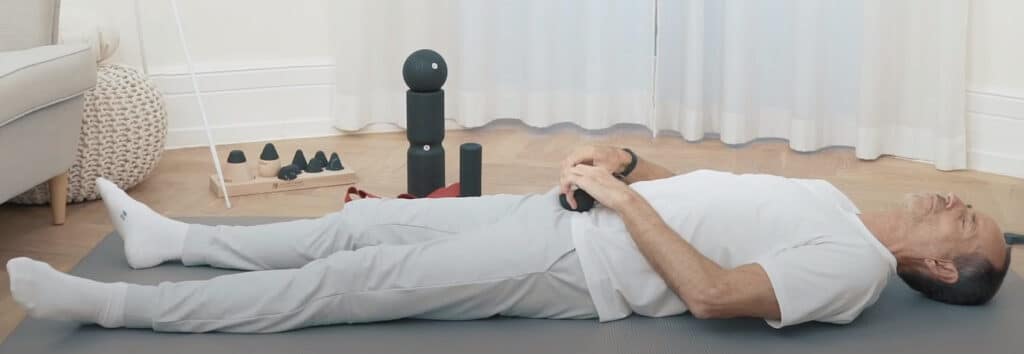
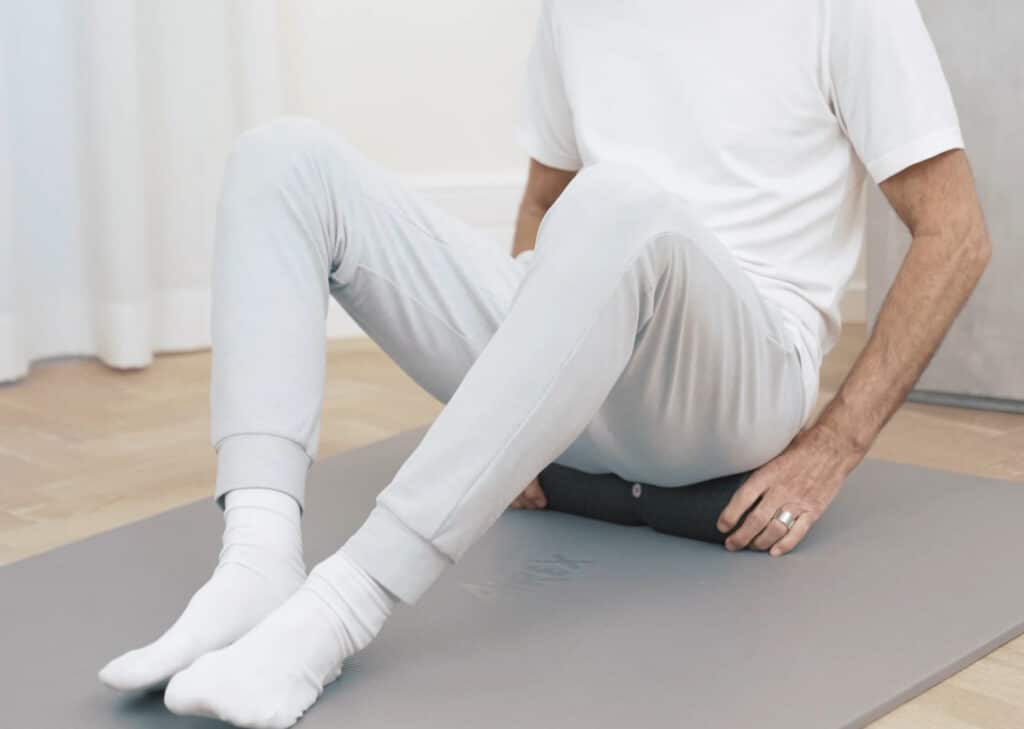
Step 4: Foam Rolling for Your Thigh Area
For this exercise you will need to be sitting up on the floor.
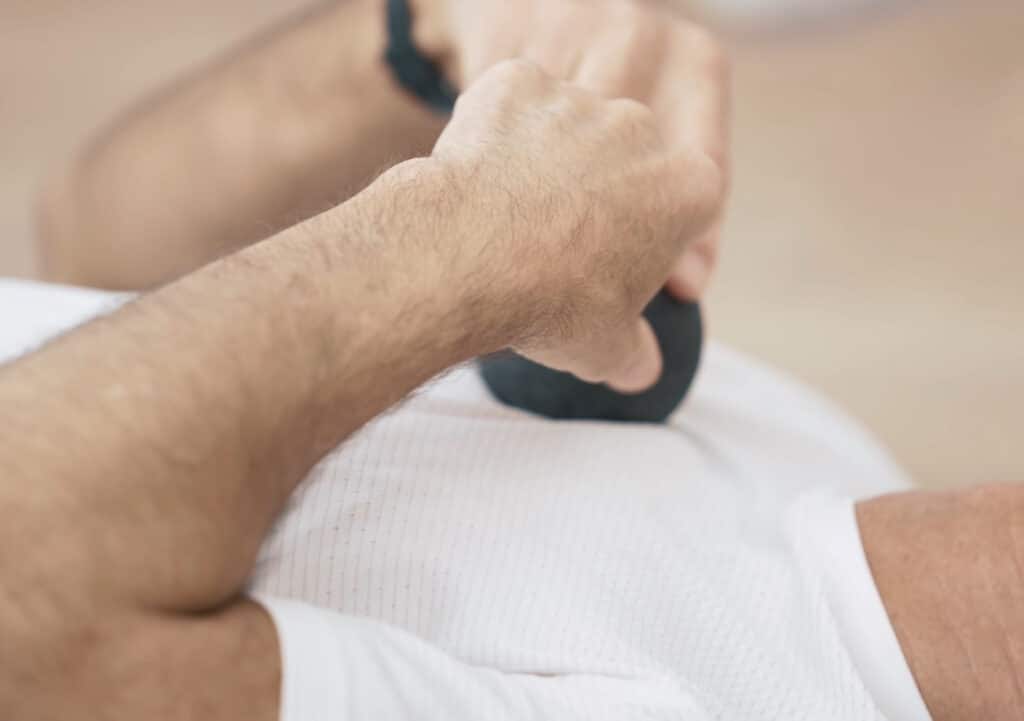
To begin, search for the muscle gap at the top on the inside of your right thigh. If you press with your hand against your leg at that point, you should notice how the adductor muscles split apart. That’s the muscle gap we are looking for – below the groin and about at crotch height. Though this gap is found on your inner thigh, you should be aware that it is slightly more towards the front side rather than near to the back of your leg.
Take the mini massage ball again and use the same small spiral movements to roll around that muscle gap. You are now searching out the most sensitive spot in order to make that the focus of your rolling massage.
Continue the slow, rolling massage for about one minute. Then switch over to now do the same on the left side. As before, your initial movements will be searching for the sensitive area where the muscle tension is. And once it has been located, you should focus more on that spot.
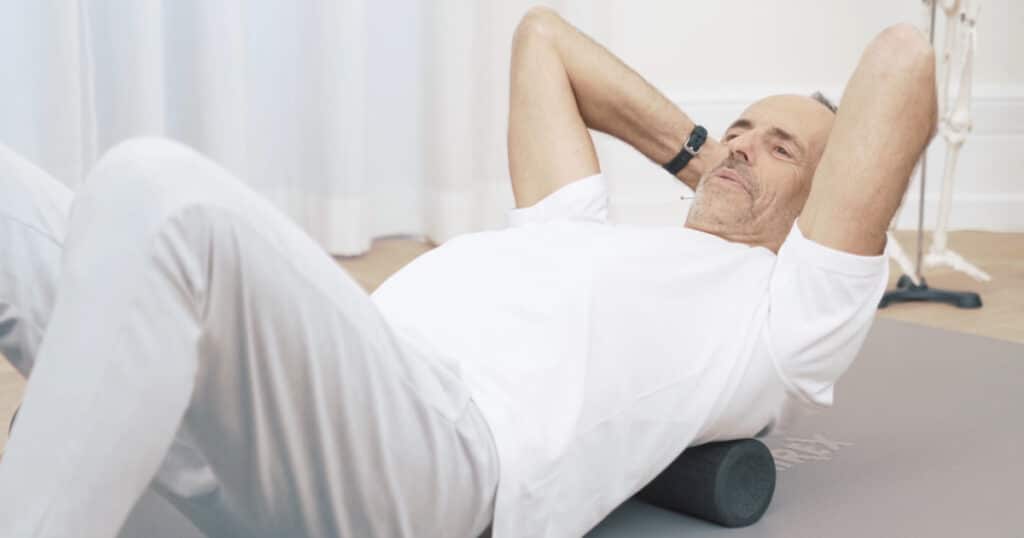
Step 5: Foam Roller Exercise for Your Spinal Regions
Time to work on the back itself! You will now need to use the midi foam roller – or something of similar size and shape which is also soft enough to avoid injuring yourself.
Place the midi roller sideways on the floor so that, carefully supporting your weight with both arms, you are able to lower yourself down on top of it.
You will end up sitting with the roller against your ischium bone – sometimes referred to as your ‘sit bone’. When you sit like this, looking straight ahead, the roller beneath you should be horizontally aligned. This is important, because the plan now is to ‘roll’ yourself forward so that the midi foam roller gradually travels along the whole of your spine.
Soon, the rolling movements will force you to slide down onto your elbows. What this also does is to increase the pressure pushing from below against your sacrum bone at the base of your lower spine. So keep your body weight moving along with a very slow rolling motion.
You will notice the iliac edge as you roll over the top of your pelvic region. This brings you slowly and gradually to the lumbar spine (lower back) region. Now you can use your arms to support some of your weight – just enough to keep your personal pain scale at a comfortable level just below ten (but above eight).
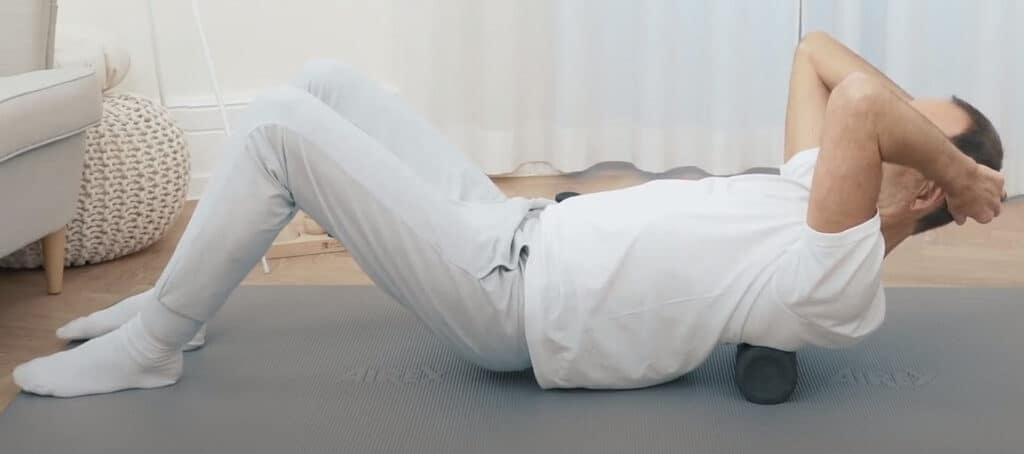
You can now creep along, millimeter by millimeter, moving on up your spine and past your rib cage area. The effect on your spinal vertebrae (discs) should be to squeeze out the old disc fluid – rather like squeezing out a sponge. Once you have rolled past a certain set of vertebrae, this will then allow them to expand again, thus drawing in a fresh supply of fluid – which has healthy implications for your back.
Tip: For those who can do so, raising your feet a little off the floor will add the weight of your buttocks to the pressure. However, this is not essential if the resultant pressure proves too great. But, if you can, even doing this for a few moments will also be beneficial.
As you travel higher up your back, you may be able to add pressure again by placing your hands behind your head. But once again, this is optional, and you can still support yourself – and control the pressure – by using your hands as a continuing support. You will find you can also inch along by pulling yourself forward with your toes.
When the foam roller reaches the level of your shoulder blades, you may find your spine clicks a little. But that is a positive sign, because it means your vertebrae are now properly adjusted.
As you move towards the cervical spine (neck) area, continue to move very, very slowly. This will avoid any sudden slide down onto your neck, and will also ensure that the foam rolling massage extends the full length of your spine, addressing your neck muscles properly in their turn.
Once you have reached this point, you will be able to lower yourself to the floor. Then you can stand back up on your feet once more, knowing you have completed these important foam roller exercises for back pain. Perhaps even more important, you have taken a positive step on the way to developing a pain-free, healthy back!
Fight Pain with Information.
Subscribe to The Pain Relief Advisor
Sign up for our free newsletter and discover how to manage your pain yourself. Every two weeks, we’ll deliver follow-along videos and articles to your inbox.
Did this contribution help you?
Then we would be happy if you shared it with your friends: