Ina sits on a stool. Her left foot touches the ground. Her right foot is attached to a stretching strap, her hands pull the foot towards her upper body.

Hip Pain

The Best Hip Exercises to Relieve Hip Pain


Body Part:
Hip

Equipment:
Stretching Strap

Level:
Beginner

Roland Liebscher-Bracht in a white shirt is kindly smiling.

Roland Liebscher-Bracht

Germany’s trusted pain specialist

Read more

Subscribe to The Pain Relief Advisor

Roland Liebscher-Bracht is performing a pain-free exercise.

Sign up for our free newsletter & get expert pain management content delivered to your inbox every two weeks.

Subscribe now

Did this contribution help you?

Then we would be happy if you shared it with your friends:

The Two Most Effective Starter Exercises for Hip Pain

If you are suffering from hip pain, you may worry that exercise will only make it worse. On the contrary! Exercising will help strengthen your muscles and fasciae so that your hip may recover and the pain subside. Our Liebscher & Bracht pain therapy makes it possible. In the following, we are sharing two special hip exercises with you, which you can ease into gradually. If you do them regularly, your hip health will improve in no time at all! Let’s get started.

Fight Pain with Information.

Roland Liebscher-Bracht is performing a pain-free exercise.

Subscribe to The Pain Relief Advisor

Sign up for our free newsletter and discover how to manage your pain yourself. Every two weeks, we’ll deliver follow-along videos and articles to your inbox.

Stretching Exercises


Ina leans on an upholstered stool with her forearms touching it. Her lower body lies on the ground. Trunk, hips and thighs are straightened. The lower legs are slightly bent and touch the ground.

Exercise 1

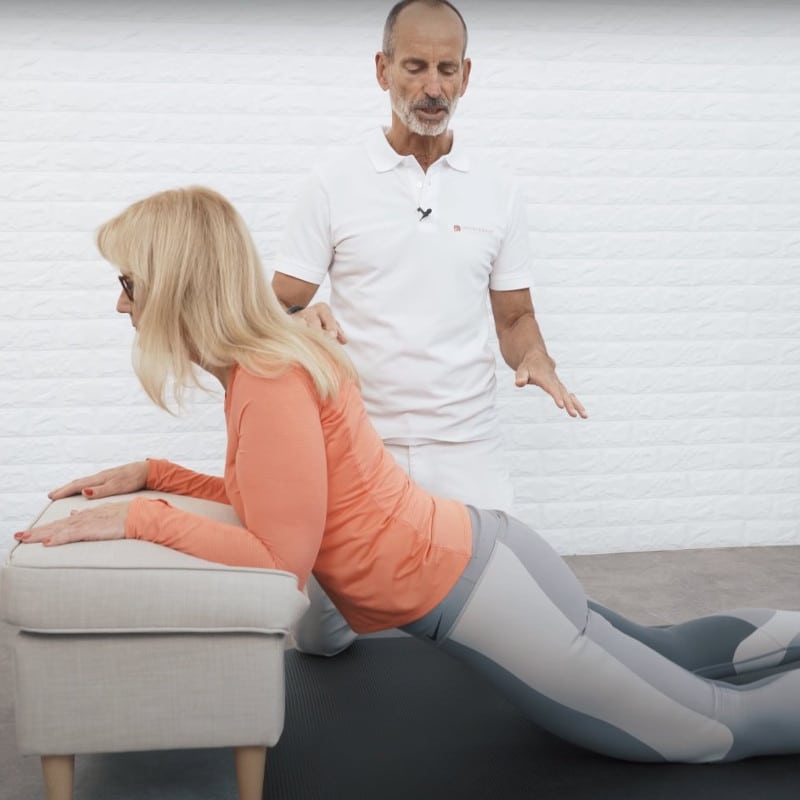
The first thing you need is an upholstered stool, couch or armchair – something gentle where you can rest your arms without causing yourself pain. Then get down on all fours ready to place your arms on the flat, padded surface in front of you. If you find your knees are too sensitive, use something like a pillow underneath them to ease the pressure when you kneel down.

  • Now place your forearms and elbows on the flat cushioned area with your palms facing down. Your starting position is correct when your face is just beyond the edge of the cushion (as in the first illustration).
  • You should then start to slowly lower your body towards the floor. If you now feel it’s pulling too much on your hip where it hurts; or if it hurts somewhere else; or if you find the weight too much for you to bear; just move a little closer to your couch. That should ease the strain a little.
  • Now lower yourself slowly down again until your body is lying against the front edge of the couch. At that point, you won’t have so much weight to bear. And as the two-minute exercise stretch begins, you may feel that stretch in different places: Perhaps in your back, or on your hips where you are hurting anyway. You might feel tense in your stomach, or get some tension in the front at the top of your thighs.
  • Wherever you feel that stretching pain, keep it below ten on your personal pain scale. Level ten is when you have to brace yourself against the pain (mentally or physically), and/or when it causes you to catch your breath. So please keep your pain level around eight. That means you feel a pain you can tolerate, yet you can still breathe normally.
  • In fact, at this moment you should check you are still breathing calmly and evenly, which then means you will be as relaxed as you can be. While some may be able to remain in this position for two minutes (and should do so) others may find it too difficult after a while.
  • So for those who need a short rest, here’s what to do: With your hands and knees remaining in the same position, ease your hips back up until you get back to your start position – but still on all fours. Now take a short rest.
  • Then go slowly back into the stretch as before – remember, only take a ‘time out’ break if you need to. Keep breathing evenly and allow the stretch to work on that painful hip as you lower yourself down.
  • You may feel as if you can’t ease down too far because of your hip pain, and for fear of making it worse. But that’s the side of your body you need to exercise. Normally, with hip problems, it’s one side that feels sore. Don’t let it worry you if, for example, you feel a lot of pain on the left, but not on the right. Because it’s that left side the exercise will be targeting!
  • Take a full two minutes over this stretch, sinking just a little more into the stretch each time you breathe out. When your time is up, ease yourself very slowly back to the start position, rock back on your haunches just a little, and stand up again.
  • When you finish, walk around a little to get your body properly relaxed. That will also give the parts you have stretched a few moments to calm down again.
Ina sits on a stool. Her left foot touches the ground. Her right foot is attached to a stretching strap, her hands pull the foot towards her upper body.

Exercise 2

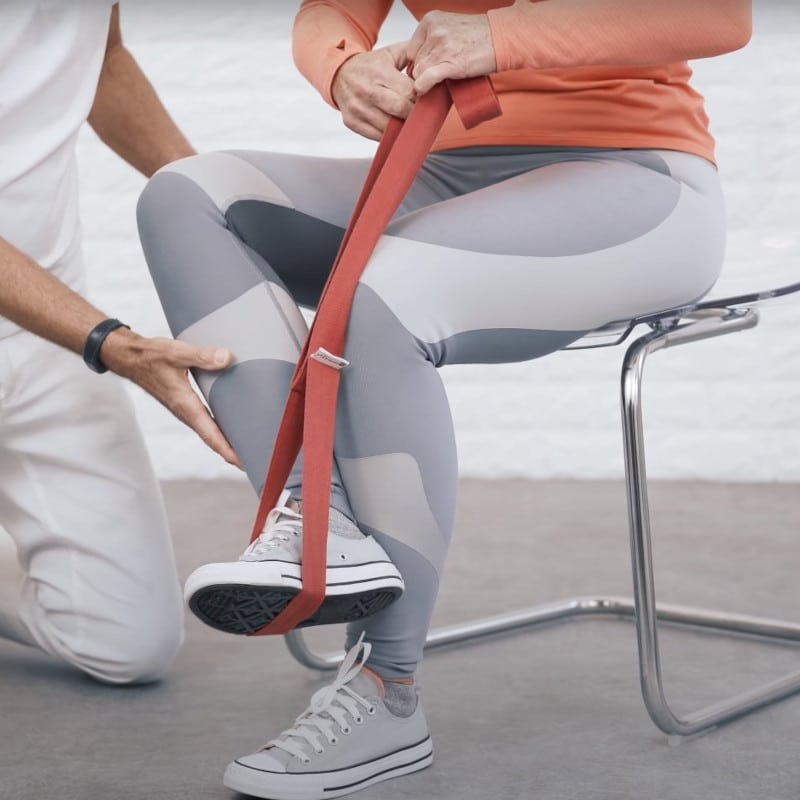
You’ll need a chair for this second hip exercise. Sit down a little away from the front edge to prevent slipping. But don’t sit too far back; otherwise, you will lose some freedom of movement. (See the second illustration.)

We’ll assume the problem is with your right hip. So if yours is the left hip, then just swap sides.

You will also need an stretching strap if you have one. Otherwise, you can use a belt or a towel – something you can let hang down to your foot, and also grip and pull with both hands.

  • Now put your right foot into the loop at the bottom, and get ready to pull and lift your leg. If you are able to do that actively, that’s fine. But if you can’t lift your leg like that, don’t worry, because we have an alternative. Just use your hands to help lift your right foot up and over, so it is resting on top of your left foot.
  • At first, when you start pulling your foot upwards, you may feel no stretch at all in your hip. That may be because you’re actually pulling your foot along against your other shin. The pull will work best when your arms are not too bent. This may mean grabbing the towel/belt/ exercise loop a little further down. And when you do feel the stretch, try to pull your foot up a little higher.
  • If your immobility rules this out – which is most unlikely – then just put your right knee directly over the left. That, of course, means you won’t need to use anything to pull.
  • This two-minute exercise begins by “walking” the hip joint very gently forward by making a hollow back. Making a “hollow back” means sitting upright with your back hollowed – in other words, not allowing your back to become rounded. Sitting up straight, you will immediately feel a corresponding stretch in the back of your buttock.
  • This stretch may even occur at the very site of your pain. If you trigger that pain, again don’t worry. It’s actually a sign that this is a good exercise for eliminating such pain. So make up your mind to work slowly and gradually into the stretch. And provided you keep to what is comfortable on your personal pain scale, this stretch will be fine.
  • Also, don’t be concerned if you can’t move very much at first. That’s not a problem at all. If you only manage to move your hip joint one millimeter a day, that’s one whole centimeter of movement after ten days!
  • You are gradually training your body to accept that movement. And as with all exercises, breathe in and out calmly as you go. You’ll then find you can increase the stretch by a small amount as you breathe out. That’s because you are most relaxed at precisely that moment.
  • When two minutes have passed, slowly lower your leg to the ground. Then stand up after a moment and move around to get your body back to normal. You should now find that the pain hurts you a little less than before.

That’s it! These two short exercises should help lessen the pain. Remember to do them regularly and not to exceed your pain threshold! All the best.

Fight Pain with Information.

Roland Liebscher-Bracht is performing a pain-free exercise.

Subscribe to The Pain Relief Advisor

Sign up for our free newsletter and discover how to manage your pain yourself. Every two weeks, we’ll deliver follow-along videos and articles to your inbox.

Did this contribution help you?

Then we would be happy if you shared it with your friends: