Herniated Disc
Herniated Disc Exercises
Body Part:
Full Body
Equipment:
No equipment necessary
Level:
Beginner
Herniated Disc
Body Part:
Full Body
Equipment:
No equipment necessary
Level:
Beginner
Escape herniated disc pain with our 6-minute exercise routine
Some call it a herniated disc. Others call it a slipped disc. And then there are the select few who call it a prolapsed disc. Call a rose by another name, and it still smells sweet. Call a herniated disc whatever you like — it’s still a source of pain.
A herniated disc can happen anywhere along your spine. The most common causes of a herniated or slipped disc are lifting heavy objects, twisting and turning, and a sedentary lifestyle. The natural bodily wear and tear of ageing can also leave you prone to a slipped disc.
Your spine is made up of vertebrae. Between the vertebrae are rubbery discs that protect your spine by absorbing shocks from daily activities and movement. These rubbery discs are made up of a soft centre covered by a durable exterior. If the centre pushes its way through the exterior, the disc is herniated.
A slipped disc may put pressure on the nearby muscles and nerves, which is what causes pain. Standing, sitting, even coughing and sneezing can ignite a sharp, burning sensation that shoots through your arms or legs. Other symptoms of a slipped disc include numbness and a general feeling of weakness in your limbs.
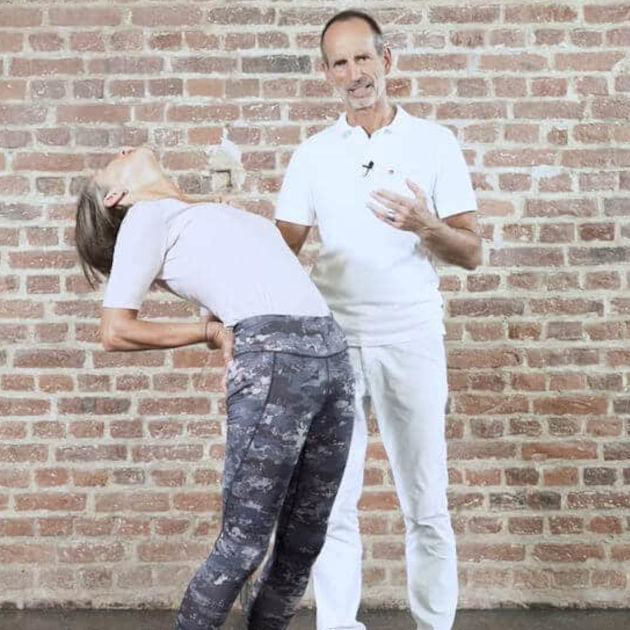
If you’re experiencing pain from a herniated disc, try our 6-minute 3-step exercise routine. You can execute it anywhere, and you don’t need any equipment. Our slipped disc work-out can help you stand more easily, sit more comfortably, and sneeze without pain so you can smell the sweet roses.
While you are executing these stretches, it’s important to be mindful of your personal pain scale. Aim for an intensity of between 8 and 9 for each stretch. Pushing yourself Intelligently at each step will maximize the benefits of the stretches and increase your flexibility.

Sign up for our free newsletter and discover how to manage your pain yourself. Every two weeks, we’ll deliver follow-along videos and articles to your inbox.
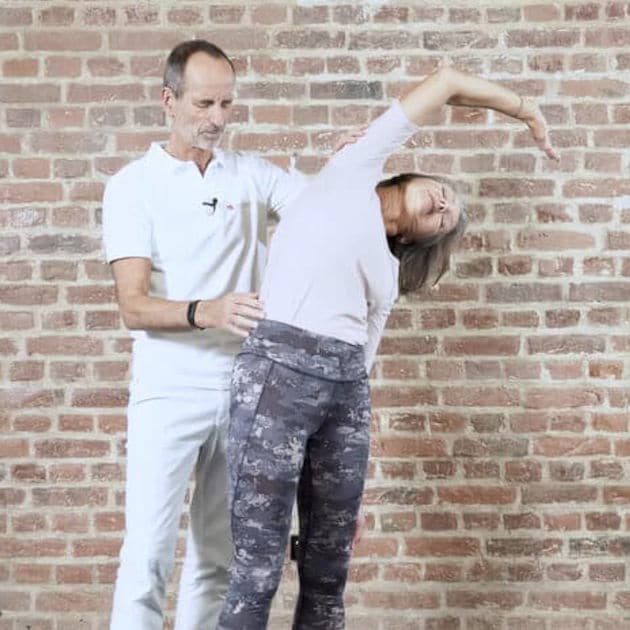
Want to measure your flexibility while you perform this stretch? Let your left hand slide down your left thigh. The further your hand is down your thigh, the more flexible you’ve become.
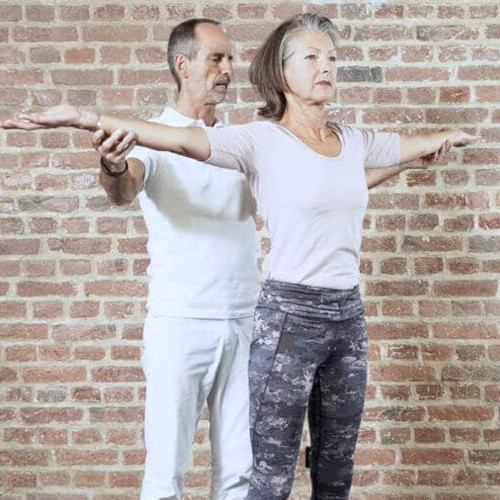
Step 3: Upper Body Rotation
Want to maximise the benefits of our 6-minute herniated disc exercise routine? Set yourself a goal of exercising every day for 6 weeks and track your progress.
Our tip: Do you find yourself lifting heavy objects frequently? If so, lift smart and lift safe: always bend at the knees when you lift. Lifting from the knees takes pressure off of your lower back and can minimise the chances of herniating a disc.
Then we would be happy if you shared it with your friends:
Sign up for our free newsletter and discover how to manage your pain yourself. Every two weeks, we’ll deliver follow-along videos and articles to your inbox.