Frozen Shoulder Exercises
Body Part:
Shoulder
Equipment:
Osteopressure Tool
Level:
Intermediate
Body Part:
Shoulder
Equipment:
Osteopressure Tool
Level:
Intermediate
Has the Ice Age returned to your shoulder? If you have acute shoulder pain or can hardly lift your arm, then this video is definitely for you. Roland reveals three osteopressure points where you can apply pressure for immediate pain relief. There is also a targeted stretching exercise to bring you long-term results. And below our video, you will find a detailed description of the exercises, which you can read through at your leisure.

Sign up for our free newsletter and discover how to manage your pain yourself. Every two weeks, we’ll deliver follow-along videos and articles to your inbox.
We will now show you three exercises with our osteopressure tool and one stretching exercise to help relieve your shoulder pain. If you perform these exercises regularly, there’s a good chance your discomfort will soon be a thing of the past. Good luck with your efforts!
For these exercises, you will need our osteopressure tool with a round handle and a soft rounded tip attachment (or something similar).

To find the right pain point, run your fingers along your collarbone. Start at the sternum (breastbone) and continue outwards until you feel this bone merge into your shoulder. Starting from the breastbone, you now move about a third of the way along and press the bone a little with your fingers from below until you find a particularly pressure-sensitive area. This is the first spot that can be important when treating a frozen shoulder.
Now, using the osteopressure tool, push the bone upwards with a little force from below. Our tip: Use your free hand to increase the pressure you apply. Feel free to gently explore this area a little to find the most pressure-sensitive spot. Then remain there for a while until you feel things start to loosen up.
Take deep breaths to help your body release the tension. Always orientate yourself on your personal pain scale from one to ten. For best results, try to work at a pressure intensity of eight or nine. Nine means you feel intense pain, yet you can still breathe calmly while exerting pressure. This applies to all other exercises too.

To find the second point, feel along your collarbone again and move your fingers further outwards until you slide into a hollow. A small, pointed bone protrudes from here. To work on this bone, you have to press against it from below with the osteopressure tool at the spot where it protrudes. Most of us are very sensitive at this point because there is high muscular-fascial tension in this area. Again, use your free hand to help build up more pressure and make sure you breathe evenly and deeply. Now stay on that spot for a while until it feels looser and more relaxed.
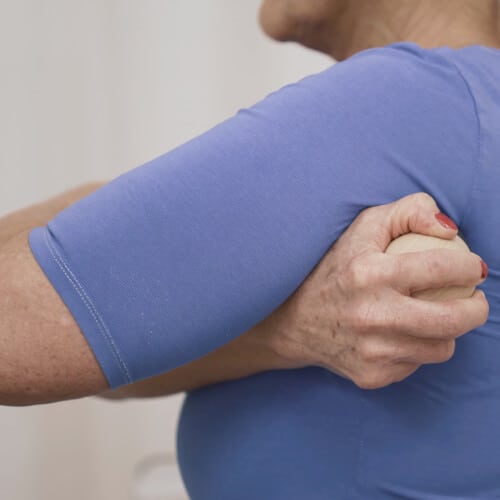
The third point is on the side of your upper body. From the outside, feel the area between the shoulder and upper arm, just below the joint. Here, there is a particularly pressure-sensitive area where you can work intensively with the osteopressure tool. Maintain the pressure until your pain sensitivity in this area begins to subside. And to help you apply optimal pressure, try to keep your free arm as far away from the pressure point as you can – so don’t let your elbow drop down.
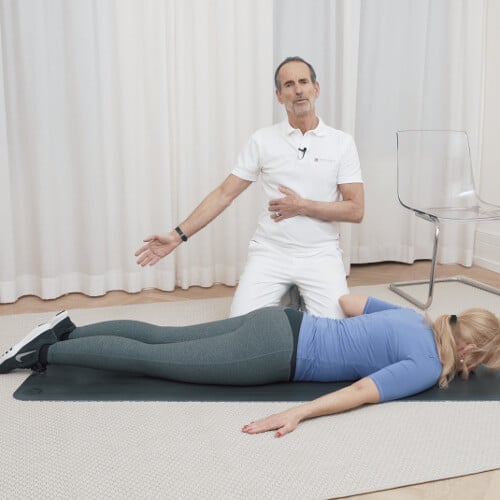
Put a mat down and lie on your stomach. Place your affected arm down on the floor and find the exact angle at which it pulls the most. Now work your way into that stretch for roughly two minutes. Keep your shoulder down on the floor, and only stretch as far as you can bear.
It may be that your frozen shoulder is so intense that your arm is still very close to your body. Try to increase the distance a little from time to time and angle your arm more and more until you can finally reach up to 45 degrees.
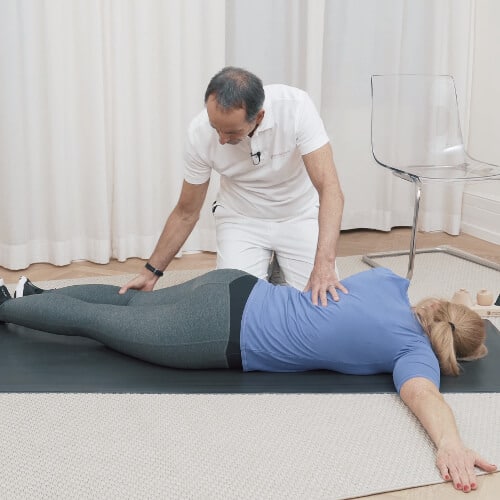
With your arm still stretched out at shoulder level, carefully move both your legs about four inches towards the opposite side your affected arm is facing. Now slowly turn your torso towards the side of your affected shoulder, stabilizing your position with the help of your outside leg by bending it slightly. Again, turn your torso, but don’t go beyond the point where the pull registers level 10 on your personal pain scale.
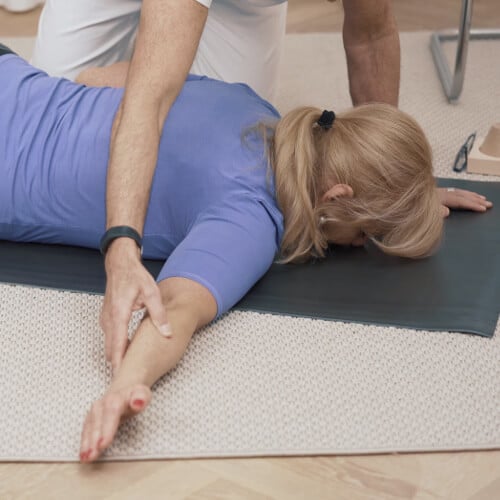
Tense your arm by pressing it briefly but firmly into the floor. Then relax the pressure before gradually going back into the stretch. Repeat this step twelve times, pulling your body towards the affected shoulder each time you relax. Now slowly move back to the starting position and try to lift your arm up. Then rotate it outward and try to lift your arm once more. Well done if you can now manage it!
Sign up for our free newsletter and discover how to manage your pain yourself. Every two weeks, we’ll deliver follow-along videos and articles to your inbox.
Then we would be happy if you shared it with your friends: