Ina's head is visible. She hold an osteopresure tool that is placed under her neck and head.

Neck Pain

Neck Pain Relief Exercise Routine


Body Part:
Neck

Equipment:
Osteopressure Tool, Foam Roller

Level:
Intermediate

Roland Liebscher-Bracht in a white shirt is kindly smiling.

Roland Liebscher-Bracht

Germany’s trusted pain specialist

Read more

download your Free pdf Guide

A preview of the Liebscher & Bracht's guide against neck pain with the front page on the left side.

Download our free guide and discover more exercises for neck pain you can do from home.

download now

Did this contribution help you?

Then we would be happy if you shared it with your friends:

These Pressure Points Can Relieve Your Neck Pain

Neck pain is annoying, there’s no doubt about that. But there’s no reason to just accept the discomfort or mask it with painkillers! You can easily do something about the ache by yourself. Using methods from the Liebscher & Bracht pain therapy, the pain will be gone in no time. We’ve prepared an exercise routine that makes use of our three techniques: osteopressure for instant pain relief, foam rolling massages for long-term benefits and stretches to keep your mobility intact. If you do the exercises regularly, you can strengthen your neck and avoid neck aches in the future! Let’s get started.

Fight Pain with Information.

Roland Liebscher-Bracht is performing a pain-free exercise.

Subscribe to The Pain Relief Advisor

Sign up for our free newsletter and discover how to manage your pain yourself. Every two weeks, we’ll deliver follow-along videos and articles to your inbox.

Step 1 — foam rolling massage


Ina holds a mini foam roller with both hands. The foam roller touches the left side of her neck. Two other hands are visible.

A Foam-Rolling Massage for Your Neck

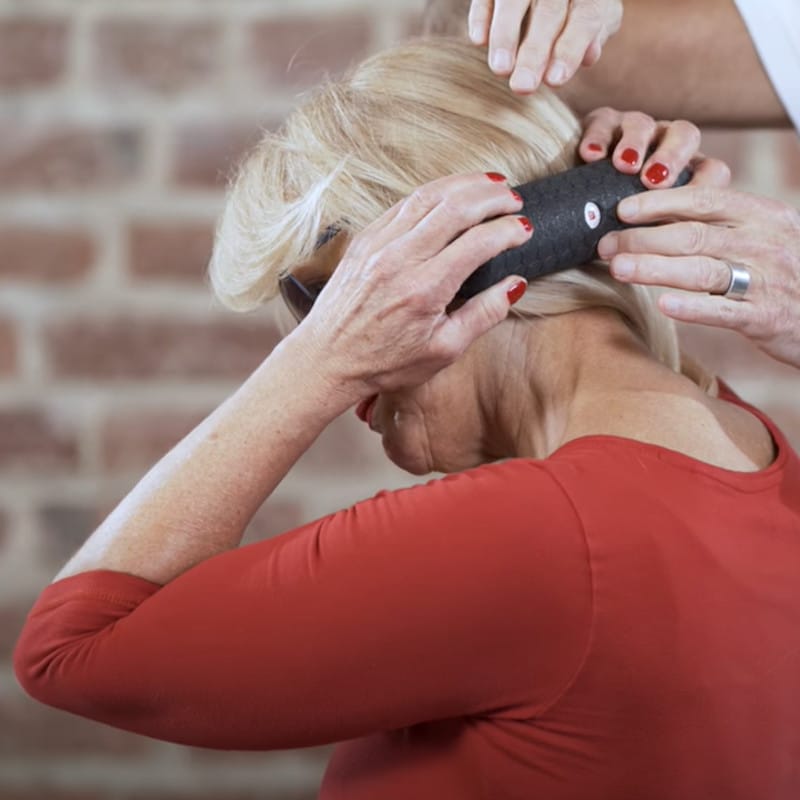
This first exercise for neck pain relief uses our mini foam roller as your massage tool. You will feel most comfortable doing this movement in a kneeling or sitting position.

  • Start by turning your head 45° to the right, with a side tilt to the front and bottom right. That will expose the neck area you will want to roll, where all your tension is at the moment.

  • Feel behind your ear for the bone that sticks out. That’s the starting point for your massage. While maintaining a constant strong pressure, roll very slowly all the way down your exposed neck muscle. Keep the roller in contact with your muscles throughout.

  • As you reach the lower points on your neck, you’ll notice that this area is probably the most sensitive. Keep the pressure tight as you start to follow the muscles out across the top of your shoulder blade. Roll slowly on out until you can get no further.

  • Now switch to the other side and roll down your neck to your shoulder blade from top to bottom in exactly the same way. It’s OK to repeat this exercise two or three times in a row, but always rolling in the same direction – downwards from the bone just behind your ear.

  • When rolling down, you should be aware that tiny movements are taking place under your skin. The rolling massage should activate tiny internal receptors – small switching elements that help your body relax and let go, making the area softer and a little easier to roll. You could also try slightly varying the angle at which you hold the foam roller, but just make sure both ends of the roller stay in alignment while you do so.

Step 2 — Osteopressure


Ina's head is visible. She hold an osteopresure tool that is placed under her neck and head.

Applying Pressure Behind Your Head

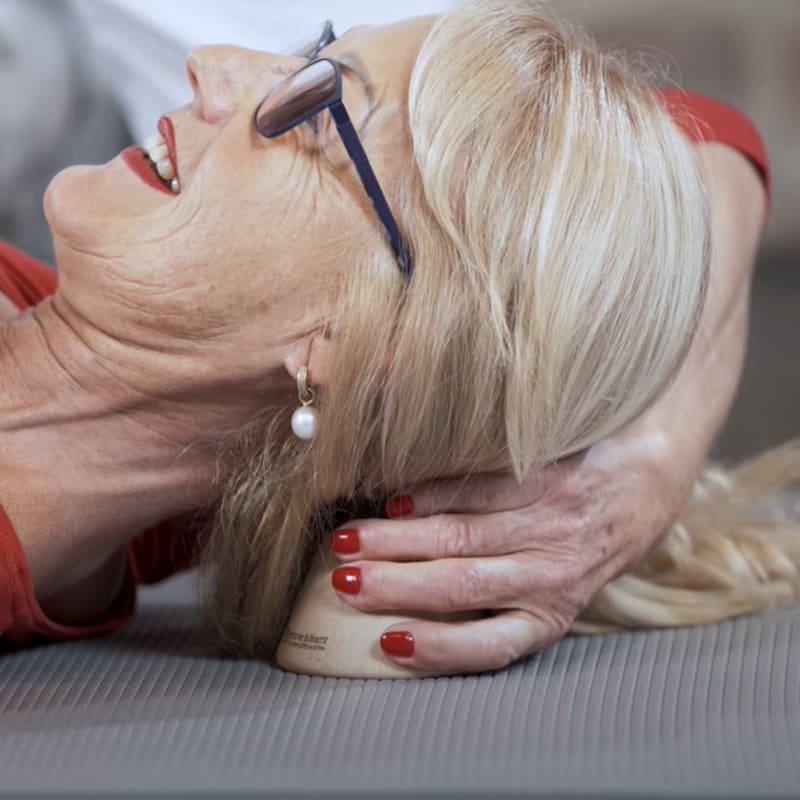
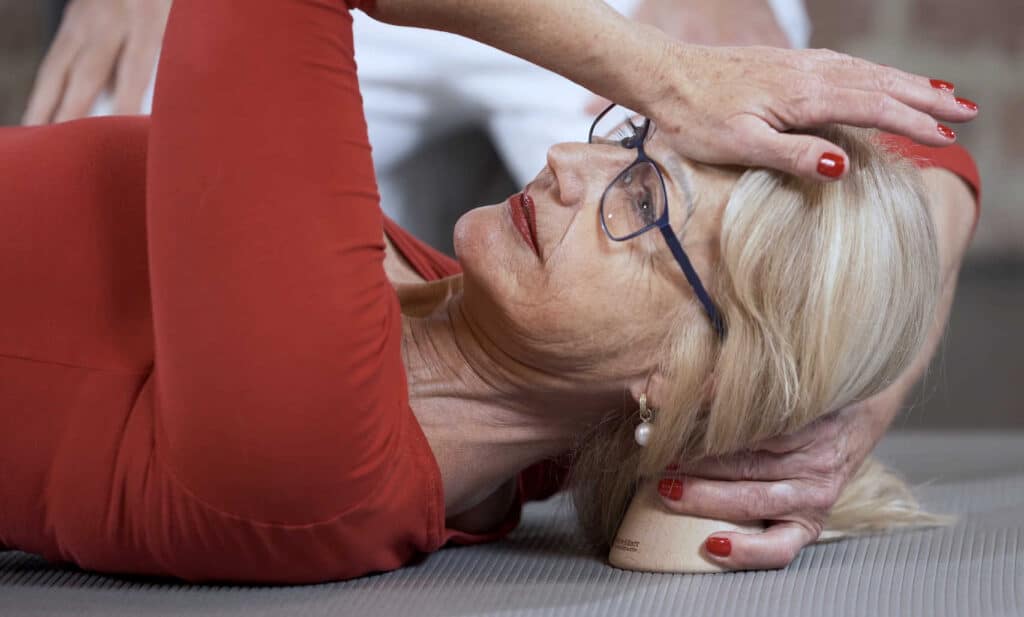
This exercise applies pressure using our set of pain-releasing tools. So take the wooden cone base and attach it to the flat cone tool. You will need to lie flat for this exercise because gravity will supply most of the pressure needed.

  • If you feel behind your head, you should feel a knot/bone area down towards your neck. Place the flat pain-releasing tool behind your head and to the left of this spot. Use your right hand to steady the tool and keep it in position. This area may feel quite sensitive straight away. However, if needed, you can also apply extra pressure by pushing down on your forehead with your left hand.
  • Control the pressure here so that it registers around eight on your personal pain scale but stay below a ten. You should be able to breathe in and out deeply while you feel pressure exerted against this spot at the back of your head.
  • Being a little more precise, you may notice the bone you feel at the back has a kind of bulge or thickening. That is the exact spot where you should position the flat tip. Gradually, over time, this spot will become less sensitive. And when this happens, you will need to move the pain-releaser tool a little further to the left into a new position – once again adding extra pressure from above if need be.
  • Always keeping your pain threshold greater than eight but less than ten is important because this ‘osteopressure’ is actually what dials down your sensitivity. The more the tension in the corresponding muscles is reduced, the less sensitive that area becomes. 
A woman is lying on the ground, pressing a point behind her ear with an osteopressure tool.

Moving to a Different Area

  • Now you will need to switch to another new position. This is behind your left ear close to the little bone. Here, you may find that gravity is not quite enough to trigger the effect level you want. So add some extra pressure from above, if required.
  • When you are calm and ready, it’s now time to treat the other side. So, move the tool back into the middle, this time just to the right of the knot/bone area. Once again, you should be able to allow your body weight to apply the pressure you require. But remember you can add extra pressure from above to get your personal pain scale where it needs to be – around eight and definitely below ten.
  • The important thing here is that you should always be seeking out the area where you can just bear the feeling of pain. It clearly still hurts you, but it should still be positively below the pain threshold of ten. And once again, you should move a little further away to the side and repeat this process.
  • The point on your head where you press is always exactly opposite the position of your pain-releasing tool. Because that’s the best position to transmit that extra pressure right through the head.
  • Concentrate on your breathing through every exercise: Breathe in deeply, and breathe out deeply so that your body helps to regulate your pain.
  • Now you need to go up behind the right ear this time, remembering that it will be sensitive at first.
  • Those sensitive areas are where the receptors are located – in other words, the neck pressure points we want to address. As you search out the most sensitive points, you will also notice the sensitivity gradually decreases. And as it goes down, so the tension programs in your brain – the ones causing your pain – will be gradually erased.

Step 3 — Stretching Exercises


Ina kneels on the ground. She stretches her neck by pulling her head with the left hand towards the ground. The right hand forms a fist, the right shoulder pushes downward. Roland Liebscher-Bracht kneels next to her.

Exercise 1 — Some Further Neck Exercises

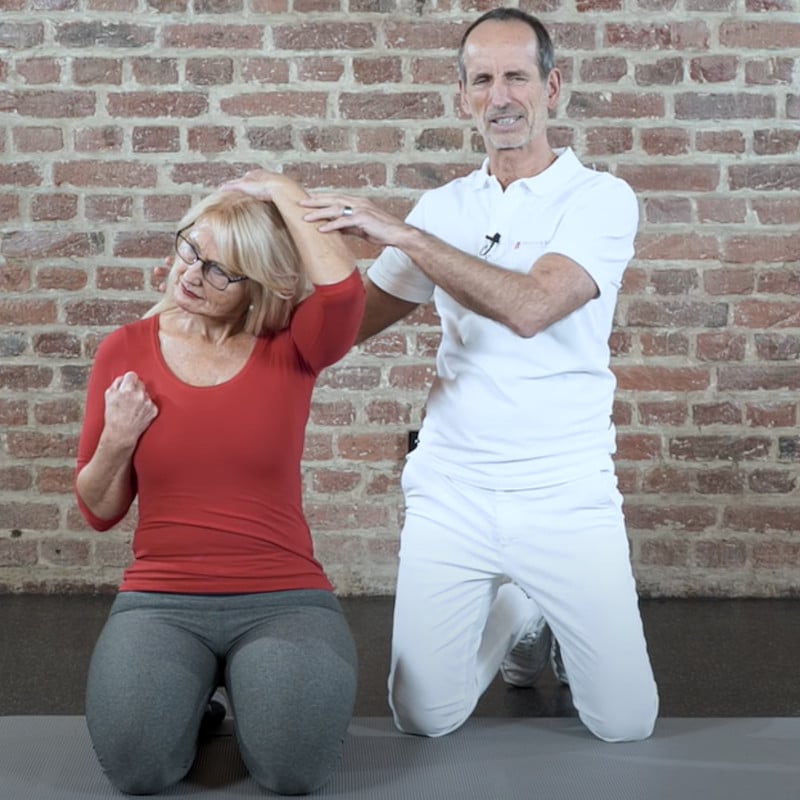
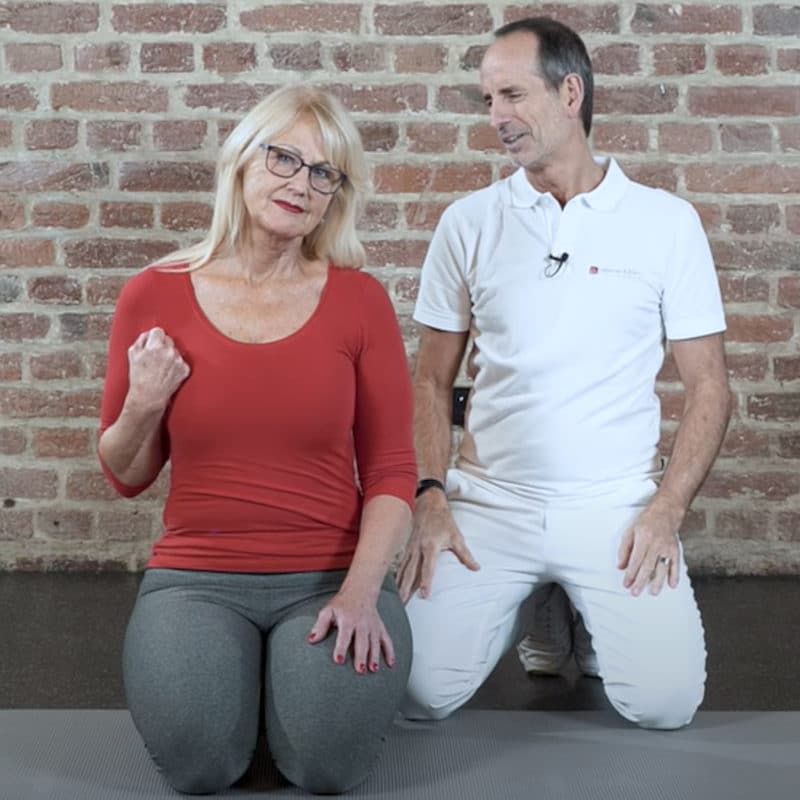
We continue our neck pain relief with some neck exercises you can perform in a comfortable sitting or kneeling position.

  • Start off by sitting up straight for a moment. This will ensure you begin with your cervical (neck) spine in a good position. Now turn your head 45° to the right and pull your right shoulder down with your right elbow bent and your arm held close to your chest.
  • From this position, reach up with your left hand and bring it up to above your right ear. Now use your left hand to pull your head forward and down. As you do so, you should feel a stretch at the back of your neck. Try to hold this stretch for between two and two and a half minutes, then relax again.
  • Now, try exactly the same stretch exercise, but on the other side: Pull your left shoulder down and use your right hand to pull your head forward and down. Hold this stretch for between two and two and a half minutes. 
Ina kneels on the ground and makes a fist with her right hand. She pulls her right shoulder downward. Roland Liebscher-Bracht kneels next to her and looks to her right shoulder.

Exercise 2 — A Sequence Of Helpful Neck Movements

Now let’s try to get some freedom of movement into your neck after all that rolling and stretching.

Once again, sit or kneel down comfortably with a nice straight back ready to move your head forward. But moving forward correctly does not mean bending your head down, but rather moving your head forward. So as you move forward, take your spine with you. And only bow your head at the end of the movement. Thus, your thoracic spine stays straight with just your head going down at the finish.

  • So: First go forward – then head down – but keep your thoracic spine straight. Press your chin against your chest and hold the position while you slowly breathe deeply, in and out, three times. Then, slowly bring your head back into an upright position.
  • Now let’s do the same in a backwards direction. That means you are now pulling your chin back. And when pulling your chin back, your cervical spine also moves back. Take this movement as far back as you can go without moving your chest.
  • When you can go no further, allow the middle of your cervical spine to move further back. And when you can go no further again, you can just allow your head to drop back too. And now again, you slowly breathe deeply, in and out, three times. Try to go a little further into your stretch each time you exhale.
  • At the finish, you should slowly straighten your cervical spine again, with no sudden movements, and remain in an upright position.

Moving Your Head in Different Ways

  • Now move your head to the left. But try to ‘push’ your head to the left using just your spine. So you’re practically sliding it to the left. As far as it will go.
  • Straighten again, and this time move your head to the left. But this time using the middle area of your neck. Again, as far as possible.
  • And finally just bend your head to the left, without turning it, so that it stays on exactly the same axis – again, as far as it will go.
  • And now, increase the stretch by pulling your right shoulder down (with a bent elbow) and bending your head to the left. Hold this position while you slowly breathe deeply, in and out, three times. Try to intensify the stretch a little more each time you exhale.
  • And finally, relax and straighten your head and neck in an upright position with your spine straight.
  • It’s now time to repeat this sequence, moving your head to the right this time. First, moving your head in three different ways, before again finishing up with an intensified stretch, pulling your left shoulder down and bending your head to the right.
Ina looks towards the ceiling, her neck is straightened. Both hands form fists, the shoulders push downwards.

Exercise 3 — Maintaining Your Cervical Spine Discs

This next neck pain relief exercise helps to remove waste from your cervical spine discs, and allows a supply of fresh nutrients to flow in.

  • To get the best from this exercise, you need to bend both arms at the elbows, which will help you to pull your shoulders down in an upright position.
  • With your shoulders down, slowly turn your head to the left as far as it will go. Then turn it slowly to the right, once more as far as it will go.
  • Now turn to the left a second time, to the fullest extent. And then do the same again on the right. From a disc perspective, this action is much like wringing out a wet cloth, and then letting it absorb some fresh water again.
  • Now do both these movements, to the left, and to the right, for a third time.
  • Stop for a moment. And now let’s do things a little faster and more relaxed. But keep pulling down with your elbows. There should be plenty of distance between your shoulders and your ears.
  • Now let your head go right forward on to your chest. And then smoothly back in the opposite direction as far as your neck will allow. Do this same head-forward and head-back sequence twice more.
  • Still pulling your shoulders down, now keep your head straight and angled 45° to the left. In this position, tip your head over to drop down backwards on the left. Then, moving in exactly the same plane, bring your head up straight and then on over towards the right. In other words: You move constantly at the same angle, crossing both sides of a straight line drawn between your shoulders.
  • Do this same angled movement a second time, and then a third time.
  • Now for the final movement: Still with your shoulders down, keeping your head straight and angled 45 ° to the right, take your head through the same sequence of movements on the opposite side.
  • When you have finished, shake your shoulders and move your head around a little just to normalize your body position. Your neck is likely to feel very different afterwards.

Get More Exercises for Neck Pain

Download our FREE PDF guide and discover more neck pain exercises you can do from home.

A preview of the Liebscher & Bracht's guide against neck pain with the front page on the left side.
All gain. No pain.

Did this contribution help you?

Then we would be happy if you shared it with your friends: